












Cable management for desk: simple steps to reduce desk clutter

A desk cable audit that stops rework and keeps troubleshooting painless
Cable clutter rarely comes from “too many devices.” It comes from unmanaged cable behavior: cords that wander across the work surface, adapters that drift into foot space, and power access that forces long runs through the most visible areas. At Urbanica, we approach cable management the same way we approach furniture design: build a structure that stays tidy under real daily use, not just for a staged photo.
The three cable categories that behave differently
Power cables and adapters
Power cords are thicker, less flexible, and often paired with bricks that generate warmth. They want a stable home with airflow and a predictable path.
Data cables that need gentle bends
Video and data cables are usually the most “fussy.” They dislike tight kinks, sharp corners, and constant tugging. Clean routing is as much about longevity as it is about aesthetics.
Peripherals that move all day
Keyboard, mouse, audio, and camera cables move with you. They should stay accessible and lightly managed rather than locked down like infrastructure.
A device map that separates “desktop essentials” from “under-desk infrastructure”
Start with a simple rule: if you touch it many times per day, it deserves a desktop-friendly path. If you rarely touch it, it belongs under the desk. Common “under-desk” candidates include power bricks, docking station power supplies, surplus cable length, and anything that only gets swapped during upgrades.
A one-minute clutter diagnosis that reveals the real culprit
Stand at the doorway and look at the desk from a few angles. Most visual mess comes from three places:
-
Cables crossing the front edge of the desk
-
A “cord waterfall” dropping from the back edge to the floor
-
A loose nest of adapters and slack resting on the floor
Once you identify which of these dominates, the rest of the plan becomes straightforward.
Cable routing starts with geometry: edges, drop points, and sightlines
A tidy desk is rarely about buying more organizers. It is about routing geometry that respects how your desk is viewed and how you move around it.
Choose a primary exit edge for all cables leaving the desktop
Pick one area where cables should leave the desktop. For many setups, the cleanest option is rear-center, which makes the routing symmetrical. Rear-corner works well when your computer tower, wall outlet, or docking station naturally lives to one side. The key is consistency: one exit edge, not three.
Create three routing lanes so cords stop braiding together
When power and data share the same path, the bundle becomes thick and visually busy. You can reduce that by assigning lanes:
-
Power lane: outlet to adapters, then to devices
-
Data lane: computer to monitors and peripherals
-
Peripheral lane: items you frequently unplug or move
Even if those lanes run parallel, separating them reduces tangles, makes changes easier, and helps the bundle lay flatter.
Measure slack the safe way so movement does not create loops
Slack is necessary, but uncontrolled slack becomes clutter. A practical approach is the “service loop” concept: leave enough length for comfortable movement and port protection, then store the remainder in a containment zone under the desk.
Where slack should live
Slack should live off the floor and out of sight, ideally under the desktop. If slack sits on the floor, it collects dust, gets kicked, and slowly drifts into walking paths.
The reset that makes cable management stick: unplug, label, group, shorten
If you try to tidy cables while everything is plugged in, you are almost guaranteed to chase the mess around rather than eliminate it. A reset is not about perfection. It is about restoring order so future tweaks stay easy.
Unplug in a controlled order so nothing gets confusing
Start by powering down sensitive devices. Then unplug the desk in categories: monitors, computer or dock, chargers, and peripherals. Place each group in its own area so you do not mix ends.
Label both ends in plain language
Labels are not overkill. They are the difference between a calm, maintainable setup and a desk that turns into chaos after one change. Use simple labels like “Left Monitor,” “Dock Power,” “Webcam,” or “Speaker Right.” Put labels on both ends so you can identify a cable no matter where you are working.
Group by destination, not by cable type
Cable type grouping looks tidy in your hands but fails in real life. Destination grouping is what keeps it maintainable. Route everything that goes to the monitor area together, everything that goes to the computer area together, and everything that serves charging together.
Shorten visual clutter without buying new cables
You do not need custom-length cables to look clean. You need controlled storage.
Coil in wide loops, not tight circles
Wide coils protect the cable and lie flatter when tucked away.
Space ties so the bundle stays smooth
A tie at each end and one in the middle often creates bulges. Instead, use consistent spacing so the bundle looks intentional and stays stable.
Under the desktop is your containment zone: build it like infrastructure
Once routing lanes exist, you need a place for the “not-pretty” parts: adapters, power strips, and excess length. This is where many setups fail. People hide everything randomly, then hate servicing it later.
Placement rules that protect knees, airflow, and access
Mount containment toward the rear underside so it stays out of leg space. Leave enough breathing room around power bricks and adapters. Avoid stacking warm adapters tightly against each other.
The order of operations that prevents an underside mess
1. Decide where your power strip will live.
2. Place and secure the largest adapters.
3. Route cables along lanes, then store slack.
4. Leave the final tightening for last, after you verify all devices power on.
When an under-desk organizer is the correct first upgrade
If your floor has a cable nest, you will feel immediate relief from moving that volume off the ground. A purpose-built under-desk solution creates a clear home for bulky components and helps the rest of your routing look clean by default. When we set up client workstations, we often start with the Under-Desk Cable Management accessory so bricks and extra length have a defined place before we refine the visible pathways.
The clean vertical drop: turning a dangling bundle into a controlled path
The fastest way to reduce desk clutter visually is to eliminate the hanging curtain of cables between desktop and floor. A controlled vertical drop creates calm instantly.
Why “one drop point” makes a workstation look cleaner
Multiple drop points create a scattered look, even if each bundle is small. One drop point consolidates the visual story of your setup. Your eye sees structure rather than chaos.
The best vertical route for daily durability
A practical path is rear edge to desk leg area, then into the under-desk containment zone. This keeps the cable bundle close to the desk structure and away from where feet and chair wheels travel.
When a modular vertical organizer beats clips
Adhesive clips can work for one or two cords. When you have several cables that need to travel down together, a vertical organizer keeps them aligned and prevents the “rope of cords” effect. For a clean desktop-to-under-desk transition, the Spine Cable Management accessory helps guide multiple cords into a single controlled run without leaving them dangling.
Power access placement that prevents cords from crossing your workspace
Many messy desks are victims of inconvenient outlets. If power lives far away, cables will cross the desk, drape from the front edge, or snake around monitor stands. The fix is not more ties. It is putting power where you actually use it.
Decide where power should live: edge access vs through-desk access
If you frequently plug and unplug chargers, edge access keeps things convenient. If your setup is more stable, through-desk power creates a clean surface with fewer cords visible.
Build a dedicated charging lane so cords stop migrating
Charging cables tend to roam because they are used casually. Give them a defined lane near the same corner every day, and keep that lane behind the working edge so cables do not intrude into your writing or typing space.
Keep the desktop visually quiet with a simple rule
Only the cables you are actively using belong on the surface. Everything else should live under the desk or route immediately toward the exit edge.
Through-desk power for permanent setups that need clean surfaces
If you want outlets and USB access without cords stretching across the top, a built-in power option can be the calmest solution. The In-Desk Power Module is designed to sit within the desktop so everyday power access stays tidy and close to where devices are used.
Clamp-on power for flexible setups and no permanent modifications
Some workspaces change weekly, or need a non-permanent solution. A clamp-on unit can place outlets at the edge of the desk while keeping the cord drop routed behind the work area. The Clamp-On Desk Power module supports that approach when you want accessible power without altering the desktop surface.
Sit-stand cable management that survives height changes without snags
Cable management becomes more important when your desk moves. The goal is not just “tidy at sitting height.” It must remain safe and controlled at every height you use.
The most common failure mode in height-adjustable setups
Cables are often routed perfectly for the sitting position, then pulled taut at standing height. That can strain ports and create a snag hazard behind the desk.
Build a travel path so cords move predictably
A reliable strategy is to anchor the bundle to the desk so it travels with the desktop, then guide the lower portion into a stable zone that does not move. This keeps movement controlled rather than random.
Anchor points should support motion, not resist it
Avoid anchoring cables too tightly in a way that prevents them from shifting as the desk rises. Gentle restraint plus a defined travel path works better than aggressive tension.
Verify slack with three quick checks
-
Lowest desk height
-
Highest desk height
-
A comfortable reach to plug in a device at the power access point
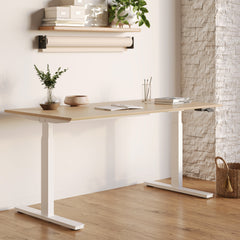
If any cable becomes tight at the highest setting, add slack into the under-desk containment zone rather than letting loops form on the surface. A setup built around a height-adjustable Standing Desk benefits most when cable routing is designed as part of the movement system, not treated as an afterthought.
Desk design choices that quietly determine how easy cable management will be
Cable management gets dramatically easier when the desk itself supports clean routing. Furniture choices can reduce the effort required to stay tidy.
Rear edge geometry changes everything
A desk with usable rear clearance gives you room to route cables cleanly without crushing them against the wall. It also creates a natural place for cords to exit without being seen from the front.
Desk proportion should match device volume
If a desk is undersized for the number of devices, cables are forced into tighter spaces, often spilling into the visible area. A bit more surface area and underside clearance can reduce clutter without adding more accessories.
Choose a desk that supports power and routing options
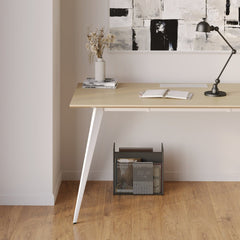
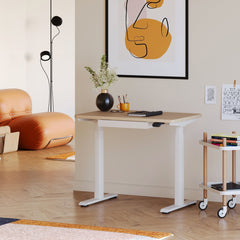
We think of a workstation as a system: the surface, the underside, and the access points all work together. The Office Desk is an example of a minimalist workstation design that can support a cleaner setup, especially when paired thoughtfully with cable routing and optional power access choices.
High-device setups without the spaghetti effect: monitors, docks, audio, and chargers
More devices do not have to mean more visible mess. The trick is to separate what is permanent from what is constantly changing.
Separate always-on cables from swap cables
Always-on cables include monitor power, monitor video, and dock power. Swap cables include phone chargers, external drives, and occasional peripherals. Give always-on cables the cleanest, most stable path, then allow swap cables a convenient lane that does not disrupt the core routing.
Create a dock zone so laptop connection becomes a single action
A docking zone keeps the daily workflow simple. Keep the dock and its cables under the desk or tucked near the rear edge, then route one primary connection to the laptop area. This reduces the urge to pull cables across the desk.
Prevent monitor cables from becoming the most visible mess
Video and power leads often hang behind displays. Keep them routed to the same drop point, then guide them down through the vertical path into the containment zone. Avoid sharp bends near connectors and resist the temptation to compress cables tightly against the wall.
Safety, durability, and maintenance that keep a tidy desk honest
A clean desk should also be a safe and reliable desk. Cable management that hides problems can create risk. Cable management that supports airflow and access protects your equipment and your peace of mind.
Heat and airflow: give adapters room to breathe
Power bricks and docking supplies can warm up during use. Avoid burying them in dense stacks. Use a containment solution that allows air movement and keeps components separated.
Strain relief prevents port damage
If a cable is hanging from a port with no support, the port becomes the anchor point. Support the cable near the device so the connector is not carrying the full load. This is especially important for laptops, docking stations, and monitor ports.
Floor runs and trip risks deserve deliberate routing
If a cable must cross open floor, route it along edges where feet do not naturally travel. Keeping slack off the floor and away from chair wheels reduces wear and prevents sudden disconnects.
Visual calm: making cable management look intentional, not improvised
A tidy setup reads as clean when the visible cues look deliberate. Even if most cables are hidden, a few small details can make the whole workspace feel designed.
Color strategy that reduces visual noise
When possible, keep visible cables consistent in color so they blend with the desk leg or wall tone. If that is not possible, keep the visible portion short and route it along edges rather than across open space.
The “one visible cable” goal
A workstation can feel nearly wireless when only one intentionally placed cable is visible, often the laptop charger or a single device lead in the charging lane. Everything else should disappear into the routing lanes and containment zone.
Straight lines and consistent spacing read as cleaner
Bundles routed parallel to desk edges look calmer than diagonal runs. Consistent spacing in ties and clips creates a sense of order, even under the desk where you only see it during maintenance.
Decision table and a 15-minute checklist for a desk that stays clutter-free
The most reliable cable management systems are easy to maintain. That means your choices should match the problem you are solving, not just the accessory you like.
Which solution fixes which desk-clutter problem
| Desk clutter problem | Most effective approach | What it prevents |
|---|---|---|
| Power bricks and slack visible on the floor | Under-desk containment zone | Dust buildup, kicked cords, visual mess |
| Dangling bundle from desktop to floor | Controlled single drop path | Cable curtain look, snag risk |
| Chargers and devices pulling cords across the desktop | Power access near the work zone | Crossing cords, messy front edge |
| Sit-stand movement causing tugging | Travel path plus slack stored under desk | Port strain, sudden disconnects |
| Frequent device swaps creating new tangles | Separate swap lane from always-on lane | Rework, braided bundles |
A structured 15-minute cable reset checklist that fits real life
1. Clear the desktop so cable paths are visible.
2. Unplug and group cables by destination, not by type.
3. Label both ends using simple, human names.
4. Choose one exit edge and one drop point.
5. Assign lanes: power, data, peripherals.
6. Mount or confirm the under-desk containment area.
7. Place power strips and large adapters first, with airflow space.
8. Route always-on cables first, then swap cables.
9. Store excess slack under the desk, not on the floor.
10. Ensure cables are supported near ports for strain relief.
11. Test all devices for power and connectivity.
12. If using a height-adjustable desk, test at lowest and highest positions.
13. Adjust slack until nothing pulls taut at full height.
14. Tuck visible segments along edges so they do not cross the work surface.
15. Leave one spare routing path for the next device you add.
Planning for the next device without breaking the system
The best cable management survives upgrades. Leave a little capacity in your containment zone, keep one spare tie point available, and avoid filling every path to the limit. When the workstation grows, the system should flex without turning into another cable pile. For teams and home offices that want a cohesive furniture-and-accessory approach, Urbanica’s workspace planning for modern office furniture page supports the broader planning side of building a desk setup that stays clean as your work changes.
Related Articles
-
 Desktop Power Outlet Planning Without Visible Cable Mess
-
 How In-Desk Power Helps Desks With Charging Stations Work
-
 How In-Desk Power Makes Charging Easier During Workdays
-
 In-Desk Power Ideas That Make Shared Tables Feel Cleaner
-
 Best In Desk Power Outlet Placement Tips for a More Efficient Workspace
-
 Clamp On vs Built In Desk Power Outlet: Which One Works Best for Your Desk?


