












Filing Cabinet Choices for Cleaner Workstation Planning
Cleaner workstation planning starts with filing storage that matches the desk, document volume, security needs, and daily workflow. Explore how cab...
Learn more
Visit quiz page to see how we makes it easy to create an inspiring workplace


Mini standing desks solve a real problem. They let a workspace exist where a full-sized station will not fit, and they make it easier to stand for parts of the day without rearranging an entire room. The tradeoff is simple and predictable. A smaller surface quietly encourages reaching, crowding, and awkward angles. Those are the exact conditions that push wrists into extension and pull shoulders upward into the upper traps.
The goal is not a perfect laboratory posture. The goal is a mini setup that supports neutral wrists, relaxed shoulders, and repeatable placement so the body is not re-solving the same ergonomic puzzle all day.
On a larger desk, you can place the keyboard, mouse, and screen where they naturally fit your body. On a compact top, you tend to place them where they fit the furniture. That sounds subtle, but it creates predictable patterns:
The keyboard creeps toward the front edge, which can bend wrists upward as you type.
The mouse ends up farther away or slightly higher, which can push the elbow out and lift the shoulder.
The monitor sits too low (laptop) or too far back, which makes you lean, tense, and reach.
Mini standing desk ergonomics is less about buying more accessories and more about arranging the few essentials so your joints stay stacked and calm.
Two angles do most of the damage in compact stations.
If the keyboard surface is even a little high relative to your elbows, wrists often bend upward to meet the keys. That extended wrist position increases load through the forearm tendons, and it can create pressure at the base of the palm when you rest your hands.
When the mouse is forward or wide, you tend to abduct the shoulder and lift it. That tension accumulates in the upper traps and the front of the shoulder. The longer the reach, the more the shoulder tries to stabilize, and that shows up as tightness near the neck or a tired, pinchy shoulder by mid-day.
Before moving gear around, use a fast audit. It reveals what is actually causing your strain so you adjust the right thing.
Place your hands on the keyboard in your normal typing position. Look at the line from your knuckles to your forearm. If your wrists are bent upward, the surface is too high or the keyboard is too close to the edge without support.
While your hands are on the mouse and keyboard, consciously relax your shoulders and let them drop. If they immediately float back up, your mouse position is too far, too high, or your elbows are not supported by your stance.
Keep your upper arm close to your side, elbow bent around a right angle. If you cannot move the cursor comfortably without your elbow drifting away from your ribs, your mouse is too far forward or too wide for the desk depth.
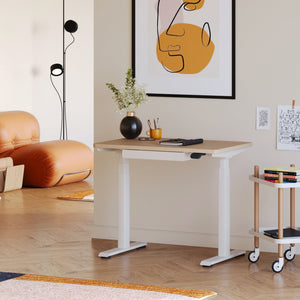
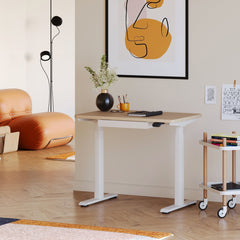
Sometimes the surface is simply not designed for stable input height and workable depth. In those cases, starting with a purpose-built compact surface can make the rest of the setup straightforward. A dedicated Mini Standing Desk is designed around the reality of small spaces and small reach zones, so you can build a neutral-wrist, relaxed-shoulder placement pattern without fighting the furniture.
It is tempting to set the desk height based on where the monitor looks best. For strain prevention, the monitor is not the first adjustment. The keyboard and mouse create the working height. Once your hands are neutral, the screen can be positioned to match.
In standing, you want elbows comfortably bent with forearms roughly parallel to the floor. There is no single number that fits everyone, so use body cues instead of measurements:
If your wrists bend upward to reach the keys, the surface is too high.
If you feel your shoulders lifting to hold your hands up, the surface is too high.
If you have to hunch forward to reach the keyboard, the surface is too far away or too low, or both.
A simple cue: stand tall, let your arms hang, then bend your elbows as if you are about to type. That is your natural typing height. Bring the keyboard to that height, not your body to the keyboard.
Mini setups often place the keyboard too close to the edge or too far back. Both create problems.
If the keyboard is right on the edge, your wrists float with no support and often bend upward. If it is too far back, you reach and your shoulders elevate. The sweet spot is close enough that elbows stay near your sides, with enough forearm support so wrists do not hinge up.
A common habit is flipping up the keyboard feet. In many people, that increases wrist extension. A flatter keyboard angle often supports a straighter wrist. If you use a thin palm support, it should support the heel of the hand without forcing your wrists into an upward bend.
A palm rest can be useful as a pause point between bursts of typing. It should not be a surface you push into while actively typing. If you press down while moving your fingers, wrists often extend and the forearm muscles stay tense.
On compact stations, mouse placement is the biggest driver of shoulder strain. The simplest fix is also the most overlooked.
That sounds backward, but it works. When the mouse sits slightly closer, you can keep your elbow tucked and move from the forearm and hand instead of reaching from the shoulder. This reduces shoulder abduction and upper-trap activation.
A mouse parked forward invites reaching. A mouse parked wide invites the elbow to flare. A mouse that sits near the keyboard, aligned with the shoulder, keeps the arm in a low-effort track.
If you have to drag the mouse a long distance to move the cursor, you will use your shoulder more. Using a smooth surface and a moderate cursor speed can reduce the size of each movement. The goal is not speed. The goal is smaller reaches.
On a mini desk, the front edge can dig into the forearms, or the forearms can hang with no support. Both can increase tension.
If the edge is sharp, a thin edge pad can reduce pressure without changing wrist angle.
If your forearms hang, bring the keyboard slightly closer and consider a light forearm support strategy during pauses, not during active typing.
If you are leaning on the desk, step a fraction closer so your body weight is not being held by your shoulders.
Shoulders often tense because the eyes are working too hard to find a comfortable view. When your screen is too low, too far, or off to the side, the body compensates. On a mini desk, those compensations usually show up as shrugging and reaching.
A practical rule is to place the top portion of the screen near eye level so you do not constantly tilt your head down. If you wear progressive lenses or bifocals, you may prefer the screen slightly lower so you are not lifting your chin. The right position is the one that lets you look at the screen with a relaxed neck.
If the screen is too far, you lean forward, and your arms often creep forward with you. That increases shoulder load. A helpful cue: when you sit or stand tall, the screen should feel comfortably readable without leaning. If you find your head drifting forward, the monitor is likely too far back.
A laptop on a mini standing desk often creates two issues at once: low screen height and cramped input placement. People respond by lifting shoulders to type and craning the neck to see. That combination is a strain multiplier.
A safer strategy is to separate screen and input whenever possible. If the laptop must stay on the desk, prioritize neutral wrists and relaxed shoulders first. Then elevate the screen only if you can keep the keyboard and mouse at the right height. If lifting the laptop forces your hands upward, it is not an upgrade.
A side-by-side dual setup on a mini top usually pushes one screen off center, which rotates the neck and encourages reaching. If you truly need two displays in a small footprint, a vertical arrangement often keeps the primary screen centered and reduces lateral reach. Keep the main screen directly in front of you. Angle the secondary screen slightly toward you so you are not twisting.
Center the primary screen so your nose points to the middle of it.
Pull the screen closer until you can read without leaning forward.
Raise the screen only after your keyboard and mouse height are correct.
Reduce glare so you do not squint and tense the neck and shoulders.
Keep frequently used content on the primary screen so you are not constantly rotating and reaching.
Even with a good desk height, repetitive mouse movements can overload the shoulder if your mechanics are off. Compact desks can make this worse because the mouse is often pushed into a corner or placed on a higher surface than the keyboard.
The simplest shoulder-saving rule is this: your elbow should be able to stay close to your side while you use the mouse. When the elbow drifts out, the shoulder stabilizers work harder. Over time, this can show up as fatigue, tightness near the neck, or irritation at the front of the shoulder.
To make this workable on a mini desk, treat mouse placement as a primary decision. Do not fit it in last.
Mouse grip changes movement patterns:
A palm grip can encourage moving from the shoulder if the mouse is large and far away.
A claw or fingertip grip can reduce movement size, but it can increase finger and forearm effort if the surface is cramped.
No grip is universally best. The best grip is the one that lets you move the cursor without reaching from the shoulder and without over-tensing the forearm.
Two simple adjustments can reduce shoulder load without turning your workspace into a tech project:
Use a surface that glides smoothly so you do not muscle the mouse.
Adjust cursor speed so normal movements come from the hand and forearm, not the shoulder.
Avoid extreme settings. The aim is comfortable, controlled movement with minimal reach.
When shoulders start to climb, the body often needs a quick reset, not a long break.
Drop both shoulders, exhale, and let arms hang for a breath.
Roll the shoulders gently backward once, not repeatedly.
Open and close the hands a few times to release forearm tension.
These are not cures. They are maintenance moves that keep tension from accumulating.
A mini standing desk does not eliminate sitting. Most people alternate, and that alternation can be protective when it is done well. A supportive chair becomes the recovery station that lets wrists and shoulders reset between standing blocks.
Standing all day can create fatigue that shows up in the shoulders, even though the legs are doing the obvious work. Alternating positions can reduce overuse. The key is that the seated posture should be neutral enough that it does not create a second set of problems.
If the chair is too low relative to the desk surface, wrists bend upward to reach the keyboard. If the chair is too high, shoulders lift. In a sit-stand routine, the chair should allow you to return to a wrist-neutral position without having to shrug to reach the keys.
Armrests can reduce shoulder load by supporting the arms during pauses. They can also create shoulder elevation when set too high. If armrests force your shoulders up, they are not supportive. They are creating tension.
A practical approach is to keep armrests low enough that shoulders stay relaxed. Use them for brief support between tasks, not as a surface you push into while typing.
A chair affects how your shoulders rest, how your forearms are supported, and how easy it is to transition without changing your wrist angle. For teams or home offices that alternate sitting and standing, browsing an office chair collection makes it easier to match seating support to your actual sit-stand rhythm.
Many people set their desk correctly, then lose the benefit during transitions. They change height, then immediately start working with the keyboard too far forward or the mouse pushed aside. On a compact surface, small drifts matter.
Instead of going from mostly sitting to long standing blocks, start with shorter standing segments and increase gradually based on comfort. The purpose is to build tolerance without forcing the shoulders and forearms to stabilize for long periods before the body is ready.
When you adjust the desk, avoid holding your hands in mid-air over the keyboard or gripping the edge of the desk with elevated shoulders. Let arms relax at your sides, adjust height, then place hands back down deliberately.
Locked knees and a narrow stance often lead to a tense upper body. A comfortable stance with soft knees can reduce the tendency to brace through the shoulders. The feet should feel stable and balanced, not rigid.
After any transition, use the same order so your station remains consistent:
1. Set desk height for neutral wrists at the keyboard.
2. Place keyboard where elbows can stay near your sides.
3. Place mouse slightly closer, aligned with the shoulder.
4. Adjust monitor angle and distance last.
Consistency is a strain reducer. It prevents the daily drift that slowly pulls you into reaching and shrugging.
Pain is information. In mini setups, discomfort often comes from one of three sources: height, reach, or grip. A structured approach avoids random tweaks.
| Pain pattern you notice | Most common setup cause in mini stations | Fast adjustment to try now | Longer-term adjustment if it keeps returning |
|---|---|---|---|
| Wrist pain on the palm side | Keyboard surface slightly too high, wrists extended | Lower keyboard height or flatten keyboard angle | Improve surface height range or add stable input platform |
| Wrist pain near thumb side | Mouse too far forward or grip too tense | Bring mouse closer, relax grip, reduce big drags | Choose mouse size that fits hand and reduces reach |
| Forearm tightness or burning | Constant hovering or pressure on edge | Add light forearm support during pauses, pad sharp edge | Rework keyboard placement so wrists stay neutral |
| Upper-trap tightness near neck | Mouse too wide or shoulder creeping up | Move mouse inward, keep elbow closer to ribs | Increase usable depth or reconfigure monitor placement |
| Front-of-shoulder pinching | Reaching forward, elbows flaring | Pull inputs back, reduce reach distance | Consider a larger surface if peripherals do not fit |
| Mid-back fatigue | Leaning toward screen, monitor too far | Bring screen closer, sit or stand tall | Rebalance screen distance and height to avoid leaning |
If discomfort changes immediately when you lower the keyboard, it is likely height.
If discomfort improves when the mouse moves closer, it is likely reach.
If discomfort improves when you lighten your grip and reduce long drags, it is likely grip and movement pattern.
If you cannot place the keyboard and mouse without one pushing the other into an awkward position, you are dealing with a depth constraint, not a posture problem. In that case, your best improvements come from a surface that gives the inputs enough room to sit where your body needs them.
Different desk types create different ergonomic possibilities. The right choice is the one that supports neutral wrists and relaxed shoulders for the tasks you actually do.
A mini sit-stand station can be a great fit when you mostly use a single screen, keep your tools minimal, and prefer a short reach zone. It can also be ideal when the workspace needs to stay visually light and flexible.
The key is that the surface must allow your hands to sit at a wrist-neutral height and let the mouse live close enough that shoulders do not climb.
If you need dual monitors, use a full-size keyboard and mouse, or regularly spread out paperwork, a larger adjustable surface usually makes neutral placement simpler. More depth often means less reaching, fewer compromises, and easier transitions.
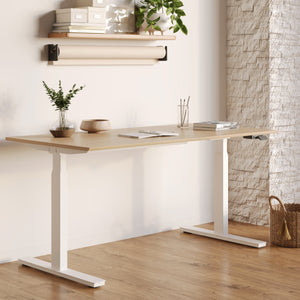
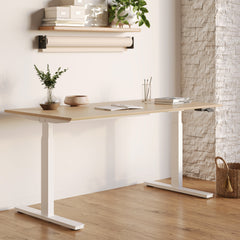
A dedicated Standing Desk can be a practical option when your current mini setup forces the mouse forward or the keyboard onto the edge, and those constraints are driving wrist and shoulder strain.
Some workflows thrive on stability. If you do a lot of writing, drawing, or detailed mouse work and you find height changes disrupt your setup, a fixed surface can reduce variability. Consistency can be protective when it keeps wrists neutral and shoulders down without constant readjustment.
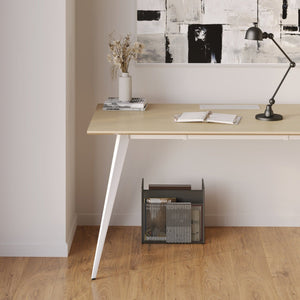
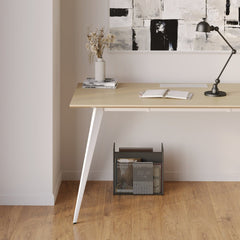
A fixed Office Desk can fit that need when the priority is a steady, repeatable arrangement that supports the same neutral angles every day.
Mini stations in shared environments introduce a new challenge. The setup must adapt quickly, or people will default to awkward positions. That is where standardization matters.
In shared stations, the most reliable rule is keyboard-first. Users can tolerate small differences in monitor height for short blocks, but hands in a bad position create immediate strain. A simple standard is:
Set the work surface so wrists stay neutral at the keyboard.
Place the mouse close enough to keep the elbow near the body.
Adjust the screen angle and distance within what the setup allows.
Standardize the things that reduce reaching and shrugging:
Keyboard position markers that indicate a safe distance from the front edge.
A designated mouse zone that keeps it close and aligned with the shoulder.
A default monitor position centered to the user.
Avoid standardizing personal preferences that vary widely, like exact cursor speed or keyboard type, unless the team uses identical equipment.
Cable drag can pull devices out of position. On compact desks, that drift quickly becomes a reach problem. Keep cables managed so the mouse and keyboard stay where they belong. Place frequently used items inside the primary reach zone, not behind the monitor.
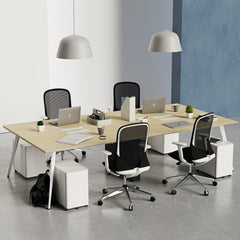
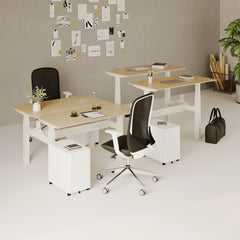
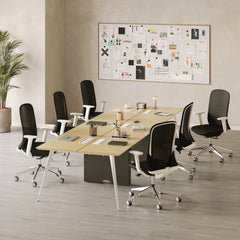
When multiple people share a station, the furniture layout influences reach and shoulder posture as much as individual habits. A Quad Workstation Desk creates a different set of spacing and cable-management needs than a single mini station. The same ergonomic principles apply, but the standardization rules matter more because each user inherits the layout.
A desk can look great and still create strain if the reach and stability do not support neutral angles. Testing does not need to be complex. It needs to reflect real use.
Stand as if you are working. Place your hand on the mouse. If you must reach forward or flare your elbow outward to use it, shoulder strain is likely over time.
Rest your forearms as you type. If the edge digs in or forces your wrists to bend upward, you will likely compensate with tension.
Type normally. If the surface shakes, the shoulders and forearms work harder to stabilize. Stability matters because your muscles should not be doing the furniture’s job.
The most useful mindset is honesty about how you work. If your day includes long mousing sessions, the mouse zone matters more than the monitor zone. If your day includes constant typing, keyboard height and forearm support matter most. The better the match between desk behavior and your real tasks, the more strain prevention you get without constant tweaking.
A well-chosen desk is only as effective as its long-term usability and support. For people who want category context and practical support details, Urbanica’s office furniture service information is a helpful reference point for planning a setup that stays stable and maintainable.
Ergonomic wins come from a routine that prevents drift. Mini workspaces drift faster because small movements create big consequences.
Stand tall and set the surface height so wrists stay neutral at the keyboard.
Place the keyboard so elbows can stay near your sides.
Place the mouse slightly closer than the keyboard and aligned with the shoulder.
Center the primary screen and bring it close enough to avoid leaning.
Take one breath and drop the shoulders before starting.
Over a week, the keyboard inches forward, the mouse slides outward, and the screen shifts back. That creep is often the real source of recurring pain.
Once a week, reset placement intentionally. If you share the station, add subtle placement cues so the next user naturally returns items to the same zones.
When discomfort persists, upgrade in the order that changes mechanics the most:
1. Fix reach and height so wrists stay neutral and shoulders stay down.
2. Improve stability so you are not tensing to control wobble.
3. Improve surface usability so keyboard and mouse can live in safe zones without crowding.
4. Add accessories only when they support the neutral angles you already achieved.
If you are comparing workspace layouts and surfaces that accommodate different input zones, the Urbanica desks collection can help you match depth and configuration to the way you actually use a mini standing station.


You have unlocked free shipping!
You're saving $29 and unlocked free shipping!
Leave a comment